SnapTap Icon
SnapTap for GooglePlay
search
SnapTap Blog
Toilet Repair

How to Tell If It's Time to Replace Your Toilet

The toilet is one of the most essential fixtures in any home, with a usage frequency that far exceeds many other household appliances or systems. However, due to this high frequency of use, it's also more prone to wear and various issues. Many homeowners overlook the need for regular maintenance or timely replacement, only addressing the problem when it becomes too serious to ignore. In fact, recognizing the signs that your toilet needs to be replaced can help you avoid more extensive damage and costly repairs down the line. It's a simple yet impactful way to enhance home comfort and reduce household expenses. So, how can you tell if your toilet is ready for "retirement"? The first indicator is frequent clogging. Occasional clogs might be caused by improper use or minor drainage issues, but if blockages occur regularly—even after plunging—it could mean that the internal design is outdated or the components are deteriorating and no longer meet modern demands. Another red flag is poor flushing performance. If your toilet consistently has weak flushes, poor water flow, or fails to fully clear the bowl, especially with older models, you're likely using more water than necessary—wasting both resources and money. Cracks and leaks are also serious indicators. If you notice constant dampness around the toilet base or visible cracks in the ceramic, even hairline fractures can worsen over time. This can lead to serious leaks that damage floors or even affect lower floors in multi-story buildings. These structural issues compromise not only safety and hygiene but can also result in significant repair costs. In such cases, replacing the toilet is often more cost-effective and secure. Beyond function, energy efficiency is another major consideration. Modern water-saving toilets feature dual-flush systems and advanced flushing mechanisms that dramatically reduce water usage compared to older models. For example, WaterSense-certified toilets can save a household thousands of gallons of water annually, resulting in significant utility bill savings. With water costs rising in many areas, upgrading to a water-efficient toilet is a smart long-term investment. When weighing repairs versus replacement, the key is to compare the costs and benefits. If a toilet constantly requires maintenance, those repair bills can quickly add up—potentially even exceeding the cost of installing a new unit. Moreover, repairs usually only provide short-term solutions without enhancing the overall user experience. In contrast, a new toilet eliminates recurring problems and offers modern comfort, efficiency, and reliability. In summary, keep an eye on signs like frequent clogs, declining flush performance, visible cracks or leaks, and outdated water usage. These are all strong indicators that your toilet may need replacing. Don't wait for minor issues to escalate into major disasters. Proactively replacing an aging toilet not only improves daily living but can also save you substantial money on future repairs and water bills. Choosing the right time to replace your toilet is a smart step toward a more efficient, comfortable, and stress-free home.
Remodeling

Home Renovation and Expansion: How to Efficiently Achieve Your Ideal Space

In modern home living, as lifestyles continue to evolve, more families are beginning to realize the importance of home renovation and expansion services. Whether the goal is to improve the living environment, increase usable space, or boost property value, renovating an old house and expanding its functionality are effective ways to achieve your ideal space. With professional renovation services, you can not only enhance the structure and appearance of your home but also tailor the functionality to meet the specific needs of your family, ensuring every inch of space is used more reasonably and efficiently. The first step toward efficient renovation and expansion is a well-thought-out design plan. Before construction begins, it's crucial to communicate thoroughly with professional designers to clarify your living needs, aesthetic preferences, and budget. A good design plan lays the foundation for the success of the entire project—it determines space layout, affects the construction timeline, and influences the overall cost. Next, applying for the necessary construction permits is essential, especially in cities or neighborhoods with strict building codes. Compliance with regulations ensures the project progresses smoothly. Throughout the construction process, choosing an experienced and reputable construction company is critical. They can effectively manage resources, control timelines, ensure quality, and prevent costly mistakes or delays. Among renovation projects, kitchens, bathrooms, and basements are the most popular areas to update. Kitchen renovations often focus on optimizing workflow, increasing storage space, and upgrading to modern appliances. Bathroom renovations emphasize wet-dry separation, slip resistance, and enhanced comfort. Basement expansions and remodels are commonly used to create home theaters, multifunctional entertainment rooms, or guest areas. These spaces not only significantly improve daily living but also add considerable value to your property. Budget control is a top concern for many families undertaking renovation and expansion projects. When planning your budget, it's recommended to break down major expenses clearly—such as design, materials, labor, and unforeseen costs. It's also advisable not to pursue the lowest price at the expense of quality, as materials and workmanship directly impact durability and future repair costs. When communicating with your construction team, ensure transparency in every cost item and maintain a flexible buffer to handle any surprises. Additionally, working with a reputable construction service provider that offers clear pricing is key to avoiding budget overruns. In conclusion, professional renovation and expansion services not only breathe new life into outdated spaces but also bring all-around improvements to family living. With proper planning, smart execution, and mindful budgeting, your family can enjoy a more comfortable and beautiful living environment while securing higher long-term value from your property. Whether you're renovating existing spaces or expanding to meet new needs, partnering with a skilled and efficient construction team is the essential first step toward realizing your dream home.
Lawn Mower

Spring Readiness: How to Get Your Lawn Mower Back in Top Shape

After a long, cold winter, lawn mowers are often left sitting idle in garages or storage sheds. With the arrival of spring, it's time to restart your mower and get it ready for a new season of lawn care. Spring lawn mower maintenance not only ensures smooth operation but also extends the life of your equipment, helping you avoid costly repairs caused by neglect. Proper lawn mower startup preparation and maintenance routines are essential tasks for every home gardening enthusiast as the growing season begins. The first step is to thoroughly clean and inspect your mower. After being stored for months, your lawn mower may be covered in dried grass, oil residue, and dust—substances that can reduce performance and even cause the engine to overheat. Use a brush and damp cloth to remove debris from the blades and outer casing, and make sure all air vents are clean and unobstructed. Then, check the engine oil—if it appears dirty or blackened, it should be replaced immediately. Also, ensure that the oil level is adequate to keep the engine properly lubricated. For gas-powered mowers, it's best to drain any old fuel left from the winter and refill with fresh gasoline to avoid starting issues caused by stale fuel. Don't overlook essential components like the spark plug, blades, and battery. A spark plug that's fouled with carbon buildup or rust may prevent the mower from starting or cause unstable engine performance. It's a good idea to remove and clean the spark plug—or replace it if needed—to ensure reliable ignition. Inspect the mower blade for cracks, dull edges, or chips. Use a sharpening tool to hone the blade edge so that it cuts cleanly rather than tearing the grass. For electric mowers, battery condition is equally important. Make sure the battery is fully charged, and if it shows signs of aging or fails to hold a charge, consider replacing it to maintain efficiency during mowing. Once these maintenance tasks are completed, the final step in your spring lawn mower maintenance routine is to test and fine-tune the mower. Before starting it up, double-check that all screws are tightened, tires are in good condition, and drive belts are not worn or cracked. Slowly pull the starter cord to gauge whether the internal mechanisms move freely or produce unusual resistance or noise. If the mower starts successfully, observe whether it runs smoothly, without strange smells or dark exhaust smoke. If you notice vibration, stalling, or other signs of trouble, there may be issues with the air intake, fuel system, or ignition—at that point, it's best to contact a professional repair service for a thorough inspection. By following this comprehensive spring maintenance routine, you can successfully wake your mower from its winter slumber and prepare it for a new season of efficient lawn care. Whether you own a basic home-use mower or a commercial-grade machine, regular upkeep is key to keeping your equipment in peak condition. Remember, taking the time now for proper spring readiness will not only boost performance but also reduce the risk of mid-season breakdowns and costly repairs. Don't wait until your lawn is out of control to discover your mower won't start—get it into top shape today and enjoy a smooth, productive spring.
Home Maintenance

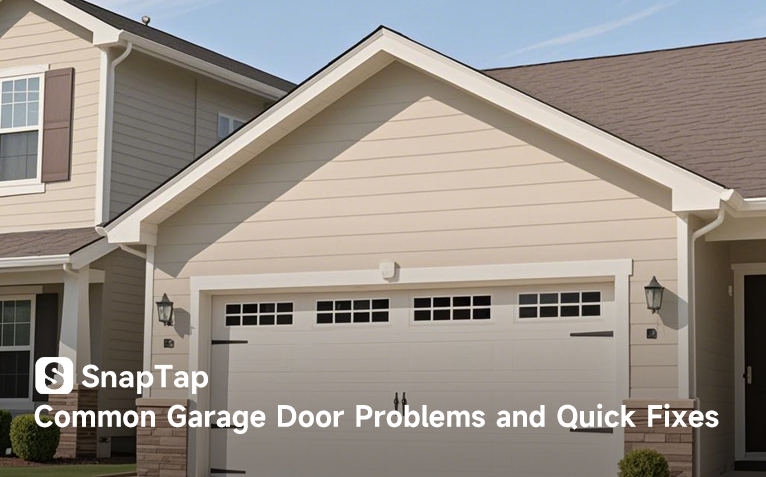
Common Garage Door Problems and Quick Fixes

In daily life, garage doors are used frequently, yet their maintenance is often overlooked. When a garage door suddenly gets stuck, won't open, or starts making unusual noises, we only then realize its importance. These seemingly minor issues are often the result of long-term wear and tear. Identifying and addressing them promptly can help prevent larger damages and ensure household safety and travel convenience. One of the most common garage door problems is the inability to open or close. This is usually related to power issues, remote control systems, or mechanical faults. First, check whether the power supply is functioning properly. Power outages or a malfunctioning control system may cause the garage door to stop responding. If the issue lies with the remote control, low battery is the most frequent culprit. Replacing the battery with a new one often solves the problem. If the issue persists, try re-pairing the remote or checking whether the receiver is disrupted or damaged. A broken spring is a more serious problem. Garage door springs bear most of the door's weight and assist in lifting and lowering. If a spring breaks, the door may not move at all and may make loud, sudden noises during operation. This is not something to fix on your own—garage door springs are high-tension components, and attempting a DIY repair can be dangerous. Professional technicians are best equipped to handle this. Garage doors that are tilted, run unevenly, or come off track are also common mechanical issues that should not be ignored. These may be caused by misaligned tracks, damaged rollers, or structural damage to the door itself. If not addressed in time, these problems can cause the door to jam, fail to close completely, or even sustain further damage. Some simple actions can help in the short term. For instance, if the remote control battery dies, replacing it with a fresh one of the same type can restore functionality. If the door doesn't run smoothly, applying a silicone-based lubricant to the tracks and rollers can reduce friction and noise. Also, if the sensor at the bottom of the door is blocked by dust, cobwebs, or debris, it might falsely detect an obstacle and prevent the door from closing. Cleaning the sensor surface can resolve this. However, not all issues should be fixed by yourself. If you notice broken springs, motor failure, or severely bent tracks, it's best to call a professional garage door repair service. These problems often involve high-pressure or heavy-duty parts, and improper handling may lead to further damage or safety risks. Professionals have the right tools and experience to repair the issues safely and efficiently. Understanding these common garage door problems and how to quickly respond to them helps you make better decisions when issues arise. Regular inspection and proper maintenance of your garage door can also extend its lifespan and reduce long-term repair costs. When in doubt, don't hesitate—calling a professional is always the safest and most reliable option.
Garage Cleaning

How to Thoroughly Clean and Optimize Your Garage Space

Many households tend to overlook the garage when it comes to cleaning. However, the garage is not only a place to park vehicles but also a multifunctional space for storing tools, miscellaneous items, and even serving as a temporary workshop. Over time, clutter, dust, and disorganized storage can make the garage cramped and chaotic. To help you fully clean and optimize your garage, this article provides a practical garage cleaning guide that walks you through each step for efficient organization and deep cleaning. First, a thorough garage cleanout requires a systematic approach. Don't expect to complete everything in an hour—plan ahead and start by removing all items from the garage. Sort them outside or on the driveway so you can clearly assess what you own. Then, categorize your items: which ones are used regularly, which are seasonal, and which are broken or unused for years. Following the "Keep, Donate, Discard" principle will help you minimize unnecessary clutter. After sorting your items, deep cleaning becomes the key step. Remove dust, oil stains, cobwebs, and debris from the floor and corners. Use an industrial vacuum or pressure washer for improved efficiency. If there are oil spills on the floor, apply a degreasing cleaner specifically made for garage surfaces. Don't forget to clean the walls and ceiling—wipe them down with a dry cloth or use a vacuum to remove dust. Once the initial cleaning is complete, disinfect the area, especially if the garage has been damp or closed for long periods. Good ventilation is essential—open doors and windows or use fans to circulate air and keep the space dry and odor-free. To further optimize your garage space, a smart storage system is essential. Install shelving units to make vertical use of the space, and consider tool boards for easy access to frequently used tools. Plastic storage bins are great for seasonal items—make sure to label them for easy identification later. If space permits, set up a workbench for small repairs or DIY projects, adding even more functionality to your garage. However, even the best organization system can fall apart over time. To prevent your garage from becoming messy again, establish a maintenance routine. Divide the garage into functional zones—such as storage, tools, and parking—to make returning items easier. Schedule monthly inspections or quarterly cleanups to keep clutter under control. Lastly, monitor what comes into the garage—before buying a new tool or item, consider if you truly need it or already own something similar. A comprehensive garage cleaning not only frees up valuable space but also revitalizes an often-overlooked area of the home. With thoughtful planning and consistent upkeep, your garage can become a tidy, efficient, and even multi-functional part of your household. Whether you're aiming for a well-organized storage area or a practical workspace, this garage cleaning guide will help you get there. Start your cleanup today and let your garage live up to its full potential!
Trim Types

A Complete Guide to Installation Techniques for Different Types of Trim

Trim serves as the "finishing touch" in home interior design. It not only enhances the overall visual layering of a space but also protects wall edges from damage. However, different types of trim have their own installation requirements and visual effects. Understanding these techniques is essential for achieving a high-quality finish. This article provides detailed insights into baseboard installation, crown molding installation tips, and casing installation essentials to help you avoid common mistakes during your renovation. Baseboards are typically installed where the wall meets the floor and are one of the most commonly used trim types. The key to a successful installation lies in their fit against the floor and overall visual harmony. To ensure a seamless appearance, the floor should be clean and level. If necessary, use caulk or thin wood shims to correct uneven areas. When facing irregular walls, a level and chalk line can help guide the installation, and any bumps or dents should be sanded or filled. For longer runs, it's recommended to use scarf joints instead of straight cuts to minimize visible seams. For secure installation, a combination of a nail gun and wood adhesive is ideal. Baseboards are suitable for nearly all indoor spaces, especially in hallways, living rooms, and bedrooms, where they protect the base of the wall from damage. Crown molding, by contrast, is more complex to install, as it is positioned at the junction between the wall and ceiling and requires precise angle cuts and higher-level techniques. Most wall corners are 90 degrees, which means each piece of molding must be cut at a 45-degree angle to meet seamlessly. An electric miter saw is highly recommended for this. To ensure a smooth finish, joints can be lightly sanded and filled with caulk. For installation, use a nail gun and seal with caulk where the molding meets the ceiling and wall. Because crown molding is installed high up, it's a good idea to paint or stain it in advance to avoid difficult touch-ups later. Crown molding is ideal for living rooms, dining rooms, and other high-ceiling areas, adding depth and elegance to any space. Casing is mainly used to frame doors and windows. It serves both decorative and functional purposes by enhancing the look and concealing gaps. During installation, make sure the casing lines up evenly with the edges of the door or window, maintaining symmetry on all sides. For best visual results, 45-degree miter cuts are commonly used at the corners for a clean and smooth transition. Typically, you should install the bottom horizontal trim first, followed by the vertical sides, and finally the top piece. This helps ensure accurate alignment and easier adjustment. After installation, all seams and nail holes should be filled with wood filler and sanded smooth before painting. Casings suit a wide variety of interior design styles, particularly those with detailed decorative elements such as American or European classics. Each type of trim serves a different function and fits into different areas of a home. Their installation techniques and considerations also vary. By mastering the basics of these trim types, you'll not only avoid costly mistakes during DIY projects but also be able to communicate more effectively with professional installers. Whether you're aiming for a cost-effective solution or a high-end finish, knowing the details of trim installation is a critical step toward achieving a polished, professional look.
home remodeling

Need Demolition Help SnapTap Has You Covered

When it comes to building Demolition, many people often underestimate the complexity and potential risks involved, which is why choosing a professional team is so important. SnapTap has experienced demolition experts who can help customers smoothly deal with various possible problems throughout the process. Demolition projects may seem like simple destruction, but in fact, they involve multiple links such as the judgment of building structure, the identification of electrical pipelines, and the protection of the surrounding environment. A slight mistake may lead to safety hazards or additional economic losses. For example, when demolishing old buildings, it is often encountered that the structural drawings are incomplete, resulting in unforeseen obstacles during the on-site demolition process. Sometimes, the handling of harmful substances such as asbestos and lead may also be involved. If not handled properly, it will not only endanger the health of construction workers, but also may violate relevant laws and regulations. In addition, when the surrounding environment of a building is complex, special attention should be paid to preventing any impact on adjacent buildings, pipelines or transportation systems. The team of SnapTap has rich practical experience in these aspects. They can conduct thorough investigations and evaluations before construction, avoid problems in advance, and ensure the smooth progress of the project.   If you are looking for reliable dismantling Services, SnapTap 's professional team is the ideal choice. Whether you are planning to renovate an old house, clear a construction site, or rebuild a commercial space, SnapTap can provide you with efficient, safe and professional demolition solutions. We understand that demolition work is not merely about "demolishing". It requires detailed planning, precise operation and full protection of the surrounding environment. SnapTap has experienced demolition experts and advanced equipment, capable of tailoring execution plans based on the specific needs of different projects to ensure the efficient completion of tasks while maintaining safety.
upgrading wardrobe and garage space

A Guide to Upgrading Wardrobe and Garage Space

With the diversification of lifestyles, people's expectations for home Spaces have long transcended basic functions. Whether it's transforming a messy wardrobe into a well-organized storage paradise or planning to upgrade a monotonous garage into a multi-functional space, behind these demands lies a profound pursuit of the quality of life. However, whether it is the refined renovation of wardrobes or the structural adjustment of garages, they are far from being accomplished simply by "hammering and tinkering". From design and planning to construction and implementation, every link requires the support of professional knowledge. Choosing an experienced team often makes the ideal home twice the result with half the effort. Wardrobe renovation: The Art of Simplifying Complexity A well-designed wardrobe can not only hold clothes for all four seasons but also make daily dressing a pleasure. Many people try to make renovations by themselves, but often due to unreasonable zoning, dimensional errors or improper material selection, space is wasted or even the cabinet body deforms. The advantage of professional teams lies in their precise understanding of needs - they can customize layered structures based on your clothing types (such as long coats and accessory storage), use innovative designs like rotating hangers and pull-down hanging rods to free up vertical space, and even enhance visual comfort through invisible lighting and color combinations. More importantly, they are well-versed in details such as the load-bearing capacity of the boards and the durability of the hardware, avoiding common problems in DIY such as slide rail jamming and shelf bending, ensuring that every inch of space can stand the test of time. Garage Upgrade: From Marginal Space to the Heart of Life Modern families' expectations for garages have long transcended the limitation of "parking and storage". Some people want to build a home gym, some need an independent studio, and even some plan to transform it into a temporary guest room. However, such projects often involve complex links such as circuit modification, waterproofing and insulation, and load-bearing structure assessment. For instance, when installing charging piles, professional electricians need to plan the load of the lines, and when converting them into residential Spaces, ventilation and moisture-proofing issues must be addressed. Professional teams can not only avoid the risks of building standards caused by private renovations, but also reserve space for future adjustments through modular design. For instance, embedding reinforcing brackets in the wall not only meets the current installation requirements of the tool wall but also leaves room for the future installation of wall cabinets or folding workbenches. This forward-looking design makes the garage truly a flexible space that can grow. The space of home is not only a container for life but also a carrier of emotions. Whether it's a beloved coat in the wardrobe or a well-maintained tool in the garage, they all need matching space to be placed. The significance of professional renovation lies not only in achieving functional upgrades but also in creating a deep resonance between the home and its occupants through scientific planning. When you have new inspirations for your space, why not let a professional team become the translator of these inspirations? They will use technology, experience and creativity to transform vague ideas into tangible reality, making your home truly a perfect companion that fits your life rhythm.
floor repair

Don't Settle For the Floor Problem

The floor is one of the most frequently encountered parts of the home in our daily life. It not only affects the visual effect of the entire space but also directly relates to the comfort and safety of use. Over time, whether it is solid wood flooring, laminate flooring or tile flooring, various problems such as wear, warping, loosening, bubbling and mold may occur. At this point, many people will consider repairing or simply replacing the floor with a new one to improve the living environment.   Whether you have just renovated a new house, want to give an old one a new style, or just have partial floor damage, it is recommended that you seek the help of professional floor installation and maintenance personnel. Because the installation and repair of the floor is not a simple matter, it involves multiple technical links such as leveling, moisture-proof treatment, size estimation, and edge finishing. If not handled properly, it may not only cause more problems but also affect the overall service life of the floor.   Professionals possess rich practical experience and specialized tools, enabling them to quickly identify floor issues and provide appropriate solutions. They can recommend the most suitable materials and construction methods based on your space type, budget and style preferences, helping you save time and energy while ensuring construction quality and aesthetics. In addition, many floor service providers will also offer after-sales guarantees, allowing you to have no worries. If your home's floor shows problems such as loosening, cracking, scratches, or discoloration, or if you are considering a complete renovation or replacement of floor materials, it is recommended that you contact a professional floor service team as soon as possible. They can offer you a one-stop service from measurement, material selection, quotation to installation or maintenance, making your home environment more comfortable, tidy and beautiful.
relocation cleaning

Bring Your Relocation Journey to A Perfect Close

Moving house is always a process full of anticipation and challenges. Whether it's the joy of moving into a new home or the sentiment of bidding farewell to an old one, the hassle of packing, moving and organizing items often leaves people exhausted. Among this series of busy activities, a crucial link that is often overlooked is a thorough cleaning. Whether it is a newly vacated old residence that needs to be restored to its original appearance or a new house that is about to be occupied and longs for a brand new look, the existence of professional cleaning services is becoming the choice of more and more people to solve this problem efficiently.   Cleaning before and after relocation is different from daily cleaning. It requires more in-depth and detailed handling. Take renting out as an example. Landlords or real estate agents usually require the house to be restored to a "habitable state", including removing stubborn stains, repairing wall scratches, deeply cleaning carpets and kitchen grease, etc. Before moving into a new home, many people hope to thoroughly disinfect and remove the traces of the previous residents' life to ensure the hygiene and peace of mind of the living environment. These jobs are not only time-consuming and labor-intensive, but also require professional tools and skills. For instance, when it comes to cleaning hidden corners such as air conditioner filters, exhaust fans, and tile gaps, ordinary families often lack equipment like high-pressure steam engines and industrial vacuum cleaners, and it is also difficult for them to master the cleaning methods for different materials. Once the cleaning fails to meet the standards, there may be deposit deductions or health risks. However, the intervention of a professional team can precisely avoid these risks. Relocation is a turning point in life, and a thorough cleaning is a crucial step to wrap up this journey. Rather than struggling to cope in exhaustion, it's better to leave professional matters to professionals. The spotless Windows, the floor as smooth as new, and the space that gives off a faint smell of disinfectant - these details are not only a decent farewell to the past, but also a solemn welcome to the new life. In the fast-paced modern society, knowing how to leverage professional strength to optimize life efficiency might precisely be the wisdom of a quality life.
home repair

The Case for Hiring Experts in Home Repairs and Assembly Work

Handyman services and furniture assembly are often seen as simple tasks that anyone can handle with a few basic tools and a bit of time. However, in practice, these jobs can be far more complicated and time-consuming than expected, especially for those without the proper skills or experience. What seems like a straightforward task — mounting a shelf, assembling a bed frame, or fixing a broken cabinet door — can quickly turn into a frustrating and even risky project if done incorrectly. One of the biggest challenges with furniture assembly is deciphering poorly written or overly complex instructions, often accompanied by diagrams that are hard to interpret. Missing parts, stripped screws, or incorrect assembly steps can lead to hours of wasted effort and, worse, an unstable piece of furniture that poses a safety hazard. In homes with children or elderly residents, a poorly assembled item can become dangerous. Handyman tasks, on the other hand, frequently require more than just a basic toolkit. Wall mounting, electrical work, plumbing repairs, or carpentry often demand specialized tools and knowledge of building codes and materials. Without this expertise, what starts as a small fix can cause more damage or even lead to costly repairs down the line. Additionally, time is a major factor. Many people underestimate how long these jobs take. A simple fix may turn into an all-day project, especially when unforeseen issues arise — like discovering that a wall isn't suitable for mounting, or that a pipe is leaking behind the drywall. For busy homeowners or renters, taking time off work or spending the weekend on trial-and-error repairs is not always feasible or efficient. Given these challenges, seeking help from a professional handyman service or furniture assembly expert is not just a matter of convenience — it's a smart investment. These professionals bring experience, tools, and efficiency, ensuring the job is done right the first time. They help reduce stress, save time, and prevent potential hazards, making the home safer and more functional. Whether it's assembling complex flat-pack furniture or tackling multiple small repairs around the house, professional help ensures a quality result that adds lasting value to your living space.
electrical installation

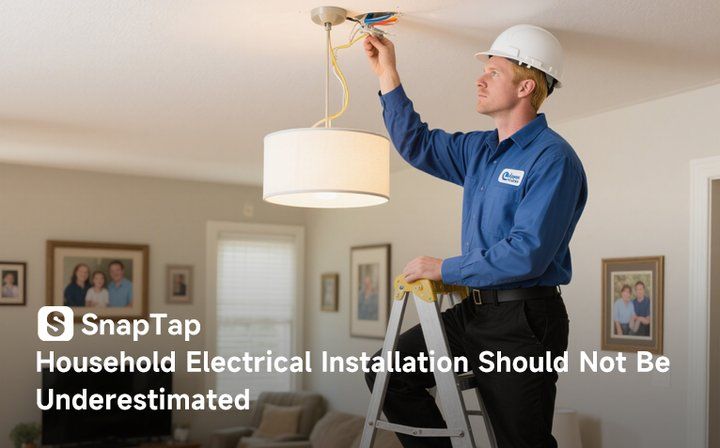
Household Electrical Installation Should Not Be Underestimated

Installing various electrical appliances at home may seem simple, but in fact, it often hides many complex and potential safety hazards. Whether it is the common Lighting Installation or the Installation and Removal of Holiday Lighting decorations, Or the Installation of fans and Switch and Outlet. These tasks all involve issues related to circuits, wire loads, fixed structures, and safety regulations. A slight mistake may cause potential safety hazards or affect the user experience.     For instance, the installation of lighting equipment not only requires aesthetics and practicality, but more importantly, it is necessary to ensure correct circuit connections and reasonable voltage matching to avoid problems such as short circuits and stroboscopic effects. The installation and removal of festival lighting fixtures are even more time-consuming and laborious. If one is not familiar with the power load and waterproof wiring, it may not only bring a festive atmosphere but also pose a risk of circuit overload. The installation of a fan may seem as simple as hanging it up and connecting it to electricity, but in fact, it is necessary to consider whether the load-bearing structure is reliable and whether a support base needs to be added; otherwise, there is a risk of it falling off after long-term operation. As for the installation of switches and sockets, many people tend to overlook the correct grounding and the arrangement of phase and neutral wires, resulting in poor contact, loose plugs, and even electric shock. These problems cannot be fully mastered just by watching a few tutorials. Electrical installation work requires professional knowledge, rich experience and corresponding tools. Especially in today's world where household appliances are closely related to home safety, it is particularly important to find a reliable professional to handle these installation tasks. Professionals can not only ensure installation quality and extend service life, but also provide you with the most suitable solutions based on your actual needs, avoiding frequent maintenance and safety risks in the later stage.   Therefore, instead of exploring and taking risks on your own, it's better to entrust these installation tasks to experienced professional technicians and let them complete them for you. It's both worry-free and reassuring. If you are planning to install lamps, holiday decorations, ceiling fans or replace switches and sockets, now is the perfect time to contact a reliable installation service provider to add light and comfort to your home while ensuring every bit of electrical safety.
moving

The Weight of Home Deserves to be Entrusted Gently

When it comes to moving a sofa, carrying a piano or adjusting the heavy filing cabinets in the office, many people's first reaction is to roll up their sleeves and do it themselves or ask a few friends for help. However, heavy furniture, narrow stairs, fragile floors and hidden wall structures could all turn this "physical challenge" into an accident. Whether it's a home relocation, an office adjustment, or simply wanting to change the position of your beloved rosewood bookcase, professional furniture moving and heavy item moving services can use their experience and tools to mitigate potential risks.   The most often overlooked aspect of self-moving is the potential safety hazard. According to statistics, over 60% of lumbar sprains are related to improper handling of heavy objects, and the toppling and slipping of furniture are common causes of household accidents. Professional teams not only wear lumbar support, anti-slip shoes and other equipment, but also assess environmental risks in advance - measuring the minimum width of the corridor corner, checking the load-bearing limit of the floor in old houses, and even using infrared levels to confirm the stability of large furniture after placement. For extremely tall, wide or irregular-shaped items, they may use professional equipment such as hydraulic lifts and telescopic forklifts, which not only protect the items but also safeguard people's safety. Many people are worried about the cost issue, but tend to overlook the hidden costs. The repair costs for door frames that are damaged during self-moving, medical expenses for sprains, and even disputes over rights protection caused by furniture damage may all far exceed the quotations of professional services. Formal moving companies usually offer insurance services, ranging from transportation insurance to third-party liability insurance, making accidents no longer a burden. What is even more valuable are some value-added services: customizing moisture-proof packaging boxes for antique furniture, helping enterprise customers restore the wiring of workstations after moving, or providing free adjustment of furniture height for elderly people living alone to meet their living needs. The essence of choosing professional moving services is respect for the quality of life. When the workers carefully wrapped the corners of the table with blankets and when the heavy bookcase slid smoothly into the designated position like feathers, those once worrying "big problems" quietly turned into peace of mind. Whether it's the old wardrobe that carries family memories or the file rack in the office that records the struggle, stories are hidden in their weight, and the professional movers are precisely the ones who ensure the smooth continuation of these stories.
Stairs Paint

Wood Stairs vs. Concrete Stairs: A Complete Guide to Painting Methods and Techniques

In home renovations or remodeling projects, stairs are more than just a structural connection between floors—they are also a major visual focal point. Repainting your stairs can refresh your living space and extend the lifespan of the structure. However, the painting methods and considerations vary significantly between different stair materials such as wood and concrete. Understanding the right techniques for each material is key to achieving both aesthetic and functional success. Wood stairs are commonly used in residential interiors for their natural texture and warm feel. However, wood is an active material that can be affected by humidity, friction, and temperature changes, so proper preparation is essential before painting. The first step is to thoroughly remove any old paint using sandpaper or a sanding machine to ensure a clean and smooth surface. Cracks, nail holes, and knots should be filled with wood filler to ensure a neat finish after painting. For the best results, choose a flexible, durable wood paint such as water-based polyurethane. These options are eco-friendly, fast-drying, and ideal for high-traffic areas. If you want to maintain the natural grain of the wood, a clear matte or semi-gloss varnish can enhance its appearance. Concrete stairs, often found outdoors, in basements, or in commercial spaces, require a different approach focused on moisture protection and surface sealing. Concrete is porous and alkaline, making it prone to issues like bubbling or peeling if painted without proper preparation. Start by deep-cleaning the surface to remove dust, grease, and debris. Next, apply an anti-alkaline primer to seal the pores and prevent chemical reactions that could damage the paint layer. When applying the topcoat, use a “thin and multiple coats” method, keeping each layer under 0.2mm and allowing full drying time between applications. Epoxy or floor paints are highly recommended for their excellent wear resistance and anti-slip properties, making them ideal for damp or high-traffic environments. Whether you're painting wood or concrete stairs, it's crucial to control drying time—avoid walking on freshly painted surfaces for at least 48 hours to allow proper curing. Ensure good ventilation to reduce fumes and promote faster drying. Temperature and humidity should also be considered; the ideal painting conditions are between 15°C and 30°C. Extremely cold or humid environments can negatively affect adhesion and drying speed. After painting, maintain the stairs with soft mops and avoid using sharp objects to prevent scratches and extend the paint's durability and appearance. Mastering the correct techniques for painting different types of stairs not only improves the visual appeal but also enhances durability. If you want to revitalize your staircase, use the appropriate painting method based on its material to create a safer and more attractive space. For professional help, contact SnapTap—we offer fast, reliable, and customized stair painting services tailored to your needs.
Pool Opening/Closing

DIY Pool Opening vs. Professional Service: Which One Is Right for You

Every spring, pool owners are faced with a familiar dilemma: should they open their pool themselves or hire a professional service to do it? This decision isn't just about time and money—it directly affects the overall pool experience and the effectiveness of maintenance throughout the swimming season. With information readily available and pool tools more accessible than ever, more and more people are attempting DIY pool openings. However, professional services still offer irreplaceable advantages. This article compares both approaches from multiple angles to help you choose the one that best suits your needs. Homeowners who choose to open their pools themselves often do so to save money. Indeed, going the DIY route can eliminate service fees associated with hiring professionals. With the right cleaning tools and water test kits, it's possible to handle the basic cleaning and setup steps. For experienced pool owners, DIY also offers the benefit of staying in control of the pool's condition and maintaining familiarity with the equipment. Additionally, having the flexibility to schedule the work on your own terms is a major plus. However, DIY pool opening comes with its challenges. The process can be time-consuming and labor-intensive, requiring tasks like removing the pool cover, clearing out debris, inspecting the pump and filtration systems, testing the water, and balancing chemicals. More importantly, without professional knowledge, key steps are often overlooked—such as detecting hidden equipment issues, maintaining proper pH levels, or using the correct chemical dosages. These oversights can lead to serious problems later in the season, including health risks and costly repairs. On the other hand, hiring a professional pool opening service significantly improves efficiency and reduces the likelihood of errors. Professional teams are equipped with advanced tools and trained technicians who can efficiently handle every aspect of the process—from cleaning and draining to system checks and chemical treatment. More importantly, they can detect potential issues right away, such as pump leaks, aging pipes, or serious water imbalances, helping you avoid future repair bills. Additionally, professional services use scientifically formulated chemical treatments, ensuring the pool water is safe and crystal clear. For families using the pool for the first time, or for those with large or complex pools (e.g., those with heating systems or spa features), hiring professionals is the safer, smarter option. If you have a small pool and are already familiar with your system, DIY pool cleaning may be more cost-effective and personally rewarding. But if it's your first season with a pool, or if you want to avoid the hassle and potential mistakes, choosing a trusted professional pool service is clearly the better option. This is especially true in regions with frequent weather changes or fluctuating water conditions, where professional maintenance plans can offer long-term reliability and peace of mind. In conclusion, whether you choose to open your pool yourself or hire a professional service, your decision should be based on your time availability, budget, and familiarity with the pool system. By comparing DIY pool cleaning and professional pool service, you'll find that the right choice is the one that ensures a safe, efficient, and cost-effective pool experience. Make pool opening easy and stress-free—starting with the right decision.
Roof Cleaning

Complete Guide to Roof Cleaning Methods: Which One Is Best for Your Roof

The roof is one of the most overlooked parts of a home's structure, yet it plays a crucial role in protecting against wind, rain, and sun exposure. Over time, pollutants, leaves, algae, and moss can accumulate on the roof surface, not only affecting the appearance of the house but also potentially causing tile deterioration and roof leaks. Therefore, choosing the right roof cleaning method is essential. The two most common roof cleaning methods on the market are Soft Washing and Pressure Washing. Each is suitable for different roof materials, and choosing the wrong one could lead to irreversible damage. Soft washing is a low-pressure system that uses specially formulated eco-friendly cleaning solutions to chemically break down organic pollutants such as mold, algae, and moss. This method is gentle and causes no physical stress to the roof surface, making it ideal for more delicate materials like asphalt shingles or wood shakes. Soft washing can penetrate the gaps between tiles and prevent regrowth of harmful organisms, making it increasingly popular among homeowners. In contrast, pressure washing uses a powerful stream of water to blast away stains and debris. It's ideal for more durable roof types such as metal roofs, concrete tiles, or ceramic tiles. While this method provides immediate and visible cleaning results, improper use can easily loosen or shift roof tiles and even damage the underlying structure, potentially causing water intrusion. That's why pressure washing should always be performed by experienced professionals who understand how to control pressure and angle properly to avoid unnecessary damage. The type of roofing material is a key factor in deciding which cleaning method to use. For example, asphalt shingles are not suitable for pressure washing as the water pressure can strip off the protective granules and shorten the roof's lifespan. Metal roofs can withstand higher pressure, but it's still important to monitor spray angles and frequency to avoid long-term wear. For ceramic or concrete tiles, both methods may be appropriate, but soft washing offers better attention to detail and environmental friendliness. Beyond effectiveness, environmental and safety considerations must not be overlooked. Soft washing typically uses biodegradable cleaning solutions that are safe for surrounding plants and won't pollute stormwater systems. While pressure washing doesn't require chemicals, its higher force can damage gutters, flashing, and seams if not handled correctly. Always ensure that roof cleaning work is carried out by certified professionals equipped with the proper safety gear to protect both the property and the workers. In summary, roof cleaning isn't just a simple matter of “spraying with water.” It requires careful consideration of roof type, level of contamination, and local weather conditions. Understanding the pros and cons of soft washing and pressure washing, and choosing the method that suits your roof's specific needs, can help you achieve the best cleaning results while extending the life of your roof. If you're unsure which method is right for your home, it's wise to consult a professional roof cleaning company for evaluation and advice, so your roof can look brand new—worry-free and hassle-free.
 Thermostat Installation

The Complete Guide to Thermostat Installation: Process, Precautions, and Expert Advice

Installing a thermostat is an upgrade many households consider when looking to improve indoor comfort and energy efficiency. Although many thermostats on the market advertise “DIY installation,” the actual process often involves complexities such as electrical wiring, voltage compatibility, and system matching, which are far more intricate than they appear. Improper installation can lead to malfunctioning devices and, in some cases, even electrical short circuits or damage to the HVAC system. Therefore, understanding the full process and essential precautions of thermostat installation is critical to ensuring a smooth setup and safe operation. Before beginning the installation, users need to take a few preparatory steps. First, choose an appropriate location for the thermostat. Ideally, it should be placed away from windows, doors, heating vents, or areas exposed to direct sunlight to avoid inaccurate temperature readings. Next, power should be turned off to ensure safety during the installation process. Users should also prepare the necessary tools, such as screwdrivers, voltage testers, a level, and wire strippers, to facilitate a smooth installation experience. Installing a thermostat typically involves several key steps. The process starts with removing the old thermostat. After turning off the power, remove the existing unit and take notes or photos of the current wiring layout for future reference. Then, based on the new thermostat's wiring diagram, connect the corresponding wires to the correct terminals on the new unit, ensuring that every connection is secure. Mount the base plate to the wall, attach the main unit, and verify it is level. Finally, restore power, set up the device, and run a functional test to make sure the system properly responds to temperature changes. Several common issues may occur during the thermostat installation process. These include wiring errors, voltage mismatches, and unstable signals. Some older HVAC systems operate on a 24V setup, while many modern smart thermostats require an additional C wire (common wire) to provide continuous power. If this wire is missing, the device may fail to start or reboot frequently. In addition, weak Wi-Fi signals can interfere with the remote-control capabilities of smart thermostats. Therefore, it's crucial to confirm your system's compatibility in advance and strictly follow the instructions in the product manual. While some users have the technical know-how to complete basic DIY installations, it's recommended to hire a professional technician—especially since thermostats are closely tied to the performance of heating and cooling systems. A professional can efficiently complete the wiring based on your specific setup and use specialized tools to verify that everything is working correctly. This minimizes the risk of future malfunctions or energy waste. Proper thermostat installation not only improves the accuracy of indoor temperature control but also helps reduce overall energy consumption, enhancing the comfort and efficiency of your home.
Garbage Disposal Repair

Should You Repair or Replace a Broken Garbage Disposal? How to Make the Most Cost-Effective Decision

When your garbage disposal malfunctions, many homeowners face a common dilemma: should you repair it or replace it entirely? This decision not only affects the convenience of your kitchen routine but also has a direct impact on household expenses. To make the most practical and budget-friendly choice, it's important to consider several key factors. First, evaluate the age of your garbage disposal. If the unit is still in its mid-life—typically between three to seven years—and this is its first issue or a rare malfunction, repair is usually the more cost-effective option. However, if the unit has been in use for more than ten years or is showing frequent problems such as jamming, unusual noises, leaking, or poor drainage, then the long-term value of repairs decreases significantly. Additionally, you should assess the cost of the repair. As a rule of thumb, if a single repair costs more than 50% of the price of a new unit, it's worth reconsidering. Frequent breakdowns could also lead to recurring labor and part replacement costs, making a replacement the more economical choice. In cases of minor issues—such as a failed start, loose wiring, or jammed blades—repairs can often be done easily and inexpensively. Choosing to repair in these situations not only saves money but is also environmentally friendly, as it avoids unnecessary waste. If your device is still under warranty, most manufacturers offer free or discounted service, making repair the obvious choice. On the other hand, if the problem involves a burnt-out motor, damaged circuit board, or significantly worn-out seals, repairs can be complicated and costly, and the unit may continue to experience problems afterward. From a long-term perspective, replacing your garbage disposal has clear benefits. Modern models offer improved energy efficiency, quieter operation, and better anti-jamming features. They also tend to be more durable and safer to use. Newer units often include stronger grinding capabilities and advanced safety designs, such as automatic shut-off and jam prevention—features that enhance daily kitchen use and offer peace of mind. In conclusion, repair is ideal for newer units with minor, infrequent issues and low repair costs. Replacement is the better route for older models with frequent breakdowns, high repair expenses, or when an upgrade in performance and safety is desired. Before making a decision, it's best to have a professional technician inspect the unit and provide a detailed assessment. A thoughtful, informed choice will help you avoid unnecessary costs while keeping your kitchen running smoothly and efficiently.
 shed building

Find the Pro for Your Shed Building or Remodeling Project on SnapTap

Whether it is to increase storage space, create a quiet working corner, or add a multi-functional cabin to the garden, Shed Building or Remodel is an excellent way to enhance the home experience. A well-designed and sturdy shed can not only enhance the overall value of the property, but also bring more possibilities to life - a handicraft workshop, a fitness area, and even a private office. The shed is not only a place for storing tools, but can also be transformed into a studio, a leisure corner, a handicraft workshop, a fitness area, or even a private office, becoming the finishing touch of the courtyard design. However, from planning and layout to material selection and construction, every step requires the support of experience and technology - this is precisely where the value of SnapTap lies. However, the construction or renovation of a truly practical and aesthetically pleasing shed is not as easy as simply "building a house". From foundation planning, waterproof structure, power wiring, to material selection and spatial layout, every step requires meticulous consideration and professional construction. Many people try to do it themselves, but often have to rework due to unreasonable design, unstable structure or non-standard construction, which is both time-consuming and costly. If you are planning to build a brand-new shed or want to renovate and upgrade an old one, instead of figuring it out yourself, it's better to directly find a reliable professional on SnapTap.  SnapTap has gathered a large number of certified experts specializing in shed construction and renovation, providing full-process services including design, construction, and material selection. Whether you want a classic wooden cabin, a modern metal structure, or a multi-functional custom space, the professionals on the platform can provide personalized solutions based on your needs. They are well-versed in balancing budget and quality to ensure that the sheds are both aesthetically pleasing and durable. Whether it's withstanding wind and rain or optimizing space utilization, they can precisely control every detail. Don't let your ideas remain on sketches anymore! Whether it's creating a home storage room, a gardening workshop, or a creative backyard lounge, SnapTap can connect you to the most suitable experts.